St. Louis, MO 63144
Ph: 314-862-COOK (2665)
Mon-Sat 9:30 am to 5:30 pm
Sun 12 to 5 pm


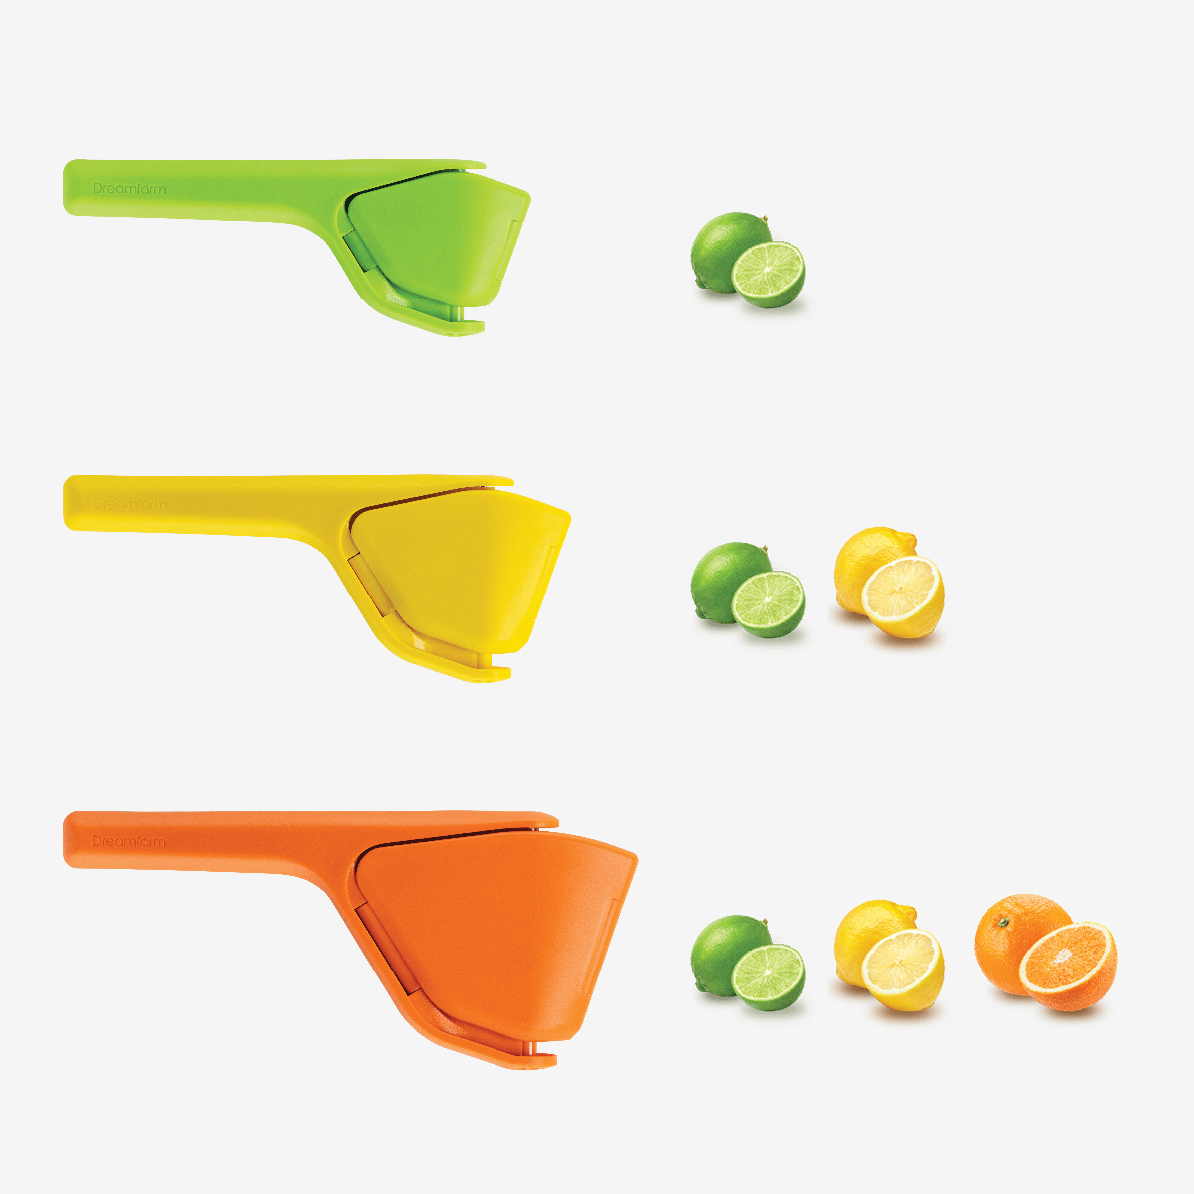
Squeeze the Day with Dreamfarm Fluicers
When life gives you lemons or limes, or oranges, no better way to make juice than with Dreamfarm Fluicers! These sleek, innovative citrus juicers are the perfect kitchen tool to bring out every last drop of goodness, and they are available in three sizes to suit all your citrus needs. Whether you are squeezing tiny […]
Exciting NEW Classes
There are many exciting new classes available with new teachers! Some of these classes are not published in our newsletter! Pizza throwing is back!! October 16: Building on Flavors with Lauren Gray Weir October 16: Let’s be Blunt About Pot Pie with Jeff Friesen October 17: You Had Me at Pie! October 20: The Big […]

Summer 2024 Cooking Classes
We hope you will join us for our summer cooking classes, that include grilling, ethnic cuisines, techniques, sauces, baking, decorating, gluten-free, vegetarian, plant-based, knife skills, date nights, girls’ nights out, parent-child classes, summer classes for children, and much more! Visit our Cooking Classes page to see a full listing! Welcome and welcome back: Sean Price […]
Spring 2024 Cooking Classes
We are thrilled to be in our beautiful new building at 9011 Manchester Road, St. Louis, MO 63144 to start our 40th anniversary! This gives us the space for more classes, and do we have more classes for you. There are more than 300 available classes! Join us in welcoming back: Barry Marcus French Favorites […]
Fall 2023 Cooking Classes
Fall 2023 Cooking Classes Welcome to our largest selection of cooking classes! If you are looking for a specific type of class or teacher, use our search refinements on cooking class page! Join us in welcoming: Annabelle Lang August 16: Heir and a Parent: Barbie’s Pretty in Pink Sushi Party Courtney McKinney, cookie decorator August […]

Summer 2023 Cooking Classes
We have lots of great choices to satisfy your culinary cravings! Please let us know if you need help finding a class, want to be on our newsletter mailing list, or want a class you do not see. Does your company have an annual holiday party or team building event? If you are thinking about hosting […]
Spring 2023 Cooking Classes
Join us in welcoming: Austin Dubinsky, a lover of chocolate and pastry February 8: Austin is Sweet on Chocolate April 6: I Can Buy Myself Flours April 26: You Big Galette, Let’s Bake a Tart! June 10: Date Night: The Garden of Eatin’ Audrey Scherrer March 9: A Green House of Vegan Soups April 15: […]
Winter 2023 Cooking Classes
Join us for a cooking class at Kitchen Conservatory! Our new winter schedule offers a wonderful variety of classes every day of the week. We make cooking fun and look forward to seeing you in class. Join us in welcoming: Laura Branson December 22: Macaron Mania – Fave Desserts January 13: Macaron Mania – Chocolate […]
Fall 2022 Cooking Classes
Join us for a cooking class! We make cooking fun with nearly 400 class listings and would love to see you in our kitchen! It is a pleasure to welcome: Angela Adrignola, personal chef September 3: Pasta is Always a Good Idea Lasse Sorensen, chef-owner of Tom’s Place in De Soto, Illinois and host of […]
Summer 2022 Cooking Classes
Join us for a cooking class! We have over 300 classes on our website! We make cooking fun, and want to see you in class! Give a big welcome to: Melanie Armbrecht, a familiar face at Kitchen Conservatory, who will use her creative talents for cake and cupcake decorating classes! June 16: Have Your Cake […]
store information
Mon-Sat 9:30 am to 5:30 pm
Sunday 12 to 5 pm
9011 Manchester Road
St. Louis, MO 63144
314-862-COOK (2665)


